Networking
Computer networking/WiFi at an event can be easy or it can be really challenging, depending on the venue and the equipment available to bring to the venue. Let’s look at two different setups:
Warning
This guide presumes some knowledge and understanding of WiFi networks and configuration. Consult Google or someone within the local FLL community for assistance if necessary.
Whichever method is used to access WiFi, refer to Sharing WiFi credentials for assistance with getting devices onto the WiFi network in use (especially important if referees are using their own devices/phones to score matches).
Note
FLL Scorer uses a self-signed SSL certificate, which means that its validity can not be verified by browsers. Browsers tend to put very scary sounding warnings when encountering self-signed SSL certificates (and rightfully so, as on the public Internet that is a good sign that you’re about to get scammed); in this case the browser should be told to visit the site anyway (the mechanics of how to do this vary from browser to browser).
Using the Venue’s WiFi
The benefit of using a venue’s WiFi is coverage; it is a fixed installation that has been designed and engineering to provide acceptable coverage throughout the venue. There are two challenges to using the venue’s WiFi:
Getting onto the venue’s WiFi network
Accessing a local peer computer once on the venue’s WiFi network
Getting onto the Venue’s WiFi network
Depending on the venue, there may or may not be a public/guest WiFi network available. If one is available, getting onto it is usually fairly easy; one of several methods are employeed by the venue’s network:
There is no password for the network, but once you connect it takes you through a temporary account registration process. The details of how this works is beyond the scope of this document; there are too many different schemes that are used by different WiFi equipment manufacturers!
The WiFi credentials are posted around the venue.
The venue personnel provides the WiFi credentials for use during the event.
In any case, getting onto the venue’s WiFi network starts with a conversation with the site coordinator, hopefully during the pre-event planning.
Peer-to-peer Access
Once onto the venue’s WiFi, the next challenge is being able to perform peer-to-peer communication. In most/all schools, for example, peer-to-peer communication is explicitly disabled on the WiFi networks (to prevent chatting, cheating, bullying, and so on). If the venue’s IT department is willing to disable the peer-to-peer restriction for the duration of the event, that is great!
If the venue’s IT department does not want to carte blanche enable peer-to-peer communication, they may be willing to enable peer-to-peer on just TCP port 8443, the only port used by the FLL Scorer system.
If they are unwilling (or unable) to enable any peer-to-peer communication, the only option is to bring in and setup your own WiFi network.
Downsides
One potential downside to using the venue’s WiFi network is that teams, coaches, spectators, and so on may be able to get onto the same WiFi network. Maybe this is a good thing; they would be able to pull up the scoreboard on their own device (assuming of course the scoreboard URL is shared!). This may reduce the crowding around the public scoreboard (but let’s be honest, isn’t that part of the fun!).
However, if there are 100 team devices pulling the scoreboard, the extra load on the scoring computer might cause problems for efficiently running the event. Furthermore, a nosey child/adult may find their way into the login-protected portion of the system, and may guess a password, or hack their way into the system. At which point they could actually change the outcome of the event. Hopefully, Gracious Professionalism will prevail and this won’t be a concern!
Setting up a WiFi Network
Bringing your own WiFi network is in many ways easier, but requires more setup at the start of the event and teardown at the end. However, a big benefit is the ability to set it up and test it ahead of time, prior to going to the venue (in fact, the setup can be tested at the start of the season and simply deployed at the events).
The big challenge with this approach is WiFi coverage. If the pits are in the cafeteria (for example) and the competition floor is in the gym, it may be difficult (or impossible) to cover both with a single WiFi access point. Which means that either a scoreboard can not be displayed in the pits (which is not a show-stopper, but it is usually nice to have a scoreboard in the pits) or a WiFi mesh network would need to be deployed.
This setup covers using a single WiFi AP for the network; the same concepts apply when using a WiFi mesh network (simply follow the the mesh setup steps provided by the device manufacturer).
Configuring the WiFi AP
There are two things that need to be done to configure the WiFi AP:
Set the WiFi SSID and password. These are the credentials for getting onto the WiFi network. It is recommended to keep the credentials fairly simple so that it not too difficult to get devices onto the WiFi network (though see Sharing WiFi credentials for how to make it simple).
Enable the 2.4 GHz WiFi signalling (likely referred to as 802.11b/g/n mode). 5 GHz WiFi signalling is great for high data rate or low latency needs (such as video streaming or playing games), but the scoring system needs neither of those capabilities. It benefits much more from the longer ranges that is achievable with 2.4 GHz signalling.
Optionally, a static IP address can be configured in the AP’s DNS server for the scoring computer with a host name of fllscorer.local. If done, the QR code links will all be https://fllscorer.local:8443/…, which is nicer than https://192.168.1.42:8443/…. The self-signed SSL certificate used by FLL Scorer is for fllscorer.local, so it also removes one of the certificate warnings from a browser (the browsers likely still warn about it being a self-signed certificate).
Deploying the WiFi AP
The ideal placement for the WiFi AP is in the middle of the places where it is accessed. Take the location of the scoring computer, the locations of the referees at the tables, and the location of the scoreboard(s) and timer(s); the center of the smallest circle that encloses all of those locations is the ideal placement. This is easier to estimate than it may seem…pick the point midway between the two locations that are furthest apart.
Stepping out of fantasy land into reality, it is rarely possible to place the WiFi AP in that location (if nothing else, the chances of a power outlet at that precise location is really small!). Starting from that ideal location, find the viable location that is closest to that location.
If a separate timer is used (in addition to or instead of a timer on the scoreboard), it is probably better to disregard the scoreboard when placing the AP (in order to get better coverage for the scoring computer, the referees, and the timer).
Once the AP is deployed, test it out from the various places to ensure that it is working well. Be willing to move it if required to get good performance. Placing the AP in an elevated place can help a lot; when it is low, the signals have to travel through and around all the intervening people. The 2.4 GHz signalling used for older WiFi (which also has a greater operational distance than the newer 5 GHz signalling) is very effectively blocked by water…and people are 60-65% water!
The scoring computer can also be used to play music in the venue (it is already connected to the sound system for playing the game sounds), in which case the WiFi AP needs to be connected to the venue’s wired network to provide Internet access (if using a streaming service such as Spotify). This requires an additional network cable running to the WiFi AP. If the music to be played is stored locally on the scoring computer, this requirement goes away (making for an easier install).
Retrieving the WiFi AP
This may seem obvious, but if the AP is simply plugged into power in a location away from the scoring computer (for example, to provide better WiFi coverage), it is more easily forgotten during the cleanup process! If the AP is next to the scoring computer, this probably isn’t a concern; if it is located elsewhere, it is a good idea to put a reminder on the scoring computer to retrieve the AP!
Allowing Teams onto the WiFi AP
It is possible to share the WiFi credentials and the scoreboard URL with teams, so they can join the network and view the scoreboard on their own device. This has its dangers though, just like using the venue’s public/guest WiFi (see Downsides).
Sharing WiFi credentials
The Config panel has a WiFi “configuration” to assist with sharing the WiFi credentials for the network in use at an event:
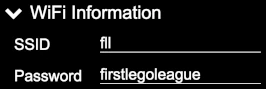
Enter the WiFi credentials (in this example, the SSID is fll and the password is firstlegoleague) and refresh the QR code page. The WiFi QR code encodes the provided WiFi credentials; scanning the QR code on a device brings up an option to join that WiFi network. Super easy, no typing required on each device that is added to the network (and more importantly, no mistyping of the WiFi credentials on devices!).
This is the power of the QR code page; a volunteer can scan the WiFi QR code to get their device onto the competition network, then scan their role-specific QR code to get to the interface that allows them to perform their role.